Ingredients
Equipment
Method
Step-by-Step Instructions
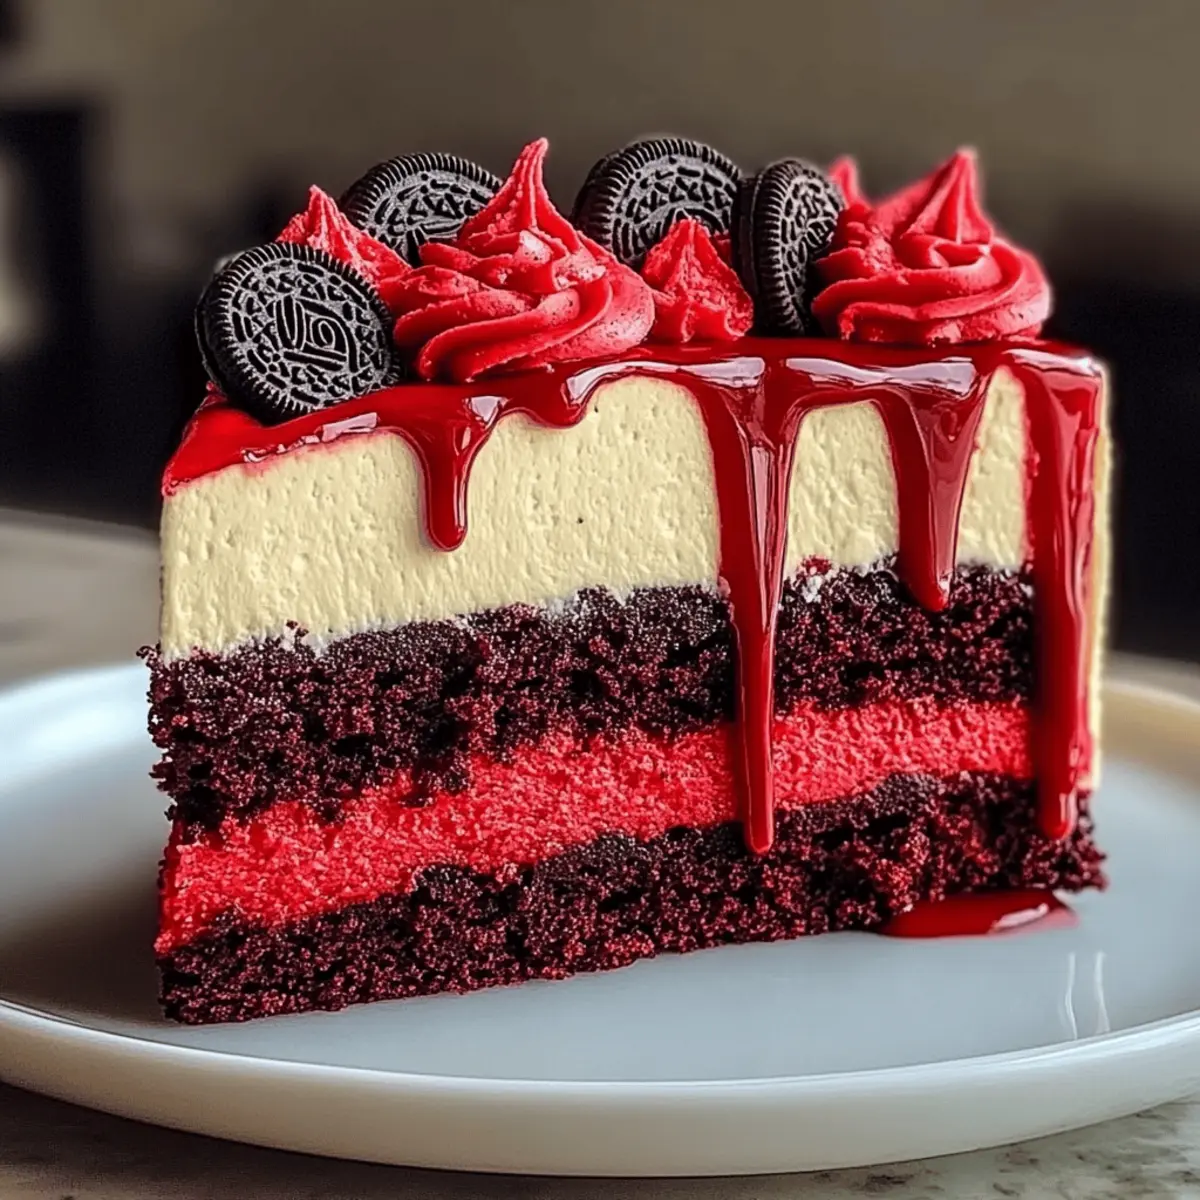
- Preheat your oven to 350°F (175°C). In a mixing bowl, combine Oreo cookie crumbs with melted butter until well mixed. Press this mixture firmly into the bottom of a springform pan to create an even layer. Bake for 10 minutes until set, then remove from the oven and allow it to cool completely.
- While the crust cools, prepare your red velvet cake batter according to your recipe or box instructions. Once the crust has cooled, pour the red velvet batter over it, spreading evenly. Bake in the preheated oven for approximately 25-30 minutes, or until a toothpick inserted into the center comes out clean. Let the red velvet layer cool completely before adding the cheesecake filling.
- In a large mixing bowl, beat the cream cheese until smooth and creamy, about 2-3 minutes. Gradually add granulated sugar, followed by vanilla extract and eggs one at a time, mixing well after each addition. Finally, stir in the optional sour cream until fully combined. Pour the cheesecake filling over the cooled red velvet layer, smoothing the top gently.
- Place the springform pan in a larger baking dish and create a water bath by adding hot water to the outer dish until it reaches halfway up the sides of the springform pan. Bake in the oven at 325°F (163°C) for 50-60 minutes, or until the center is just set with a slight jiggle. Once done, remove it from the water bath and let it cool at room temperature for about an hour.
- After cooling, transfer the Oreo Red Velvet Cheesecake to the refrigerator and chill for at least 4 hours or overnight. This setting time allows the cheesecake to firm up and develop its flavors, making for a better texture and taste when served.
- Melt white chocolate chips in a microwave-safe bowl, heating in 30-second intervals until smooth. Stir in red gel food coloring, mixing until you achieve a glossy consistency. Allow the mixture to cool slightly before pouring it over the edges of the chilled cheesecake, letting it drip attractively down the sides.
- Once the drip has set, decorate the Oreo Red Velvet Cheesecake with your choice of whipped topping or buttercream. Finish by garnishing the top with whole Oreo cookies for that delightful finishing touch.
- Carefully release the sides of the springform pan to reveal your layered masterpiece. Slice the cake with a heated knife for clean edges, dip in hot water between cuts if necessary. Serve chilled and enjoy the delightful flavors of this decadent dessert with family and friends!
Nutrition
Notes
Chill each layer before adding the next for clean separations. Use a water bath when baking to prevent cracks and keep it creamy.